Daisies in the Shade

I’ve been busy over the last few weeks…well, in the evenings when the little one has been in bed at least!

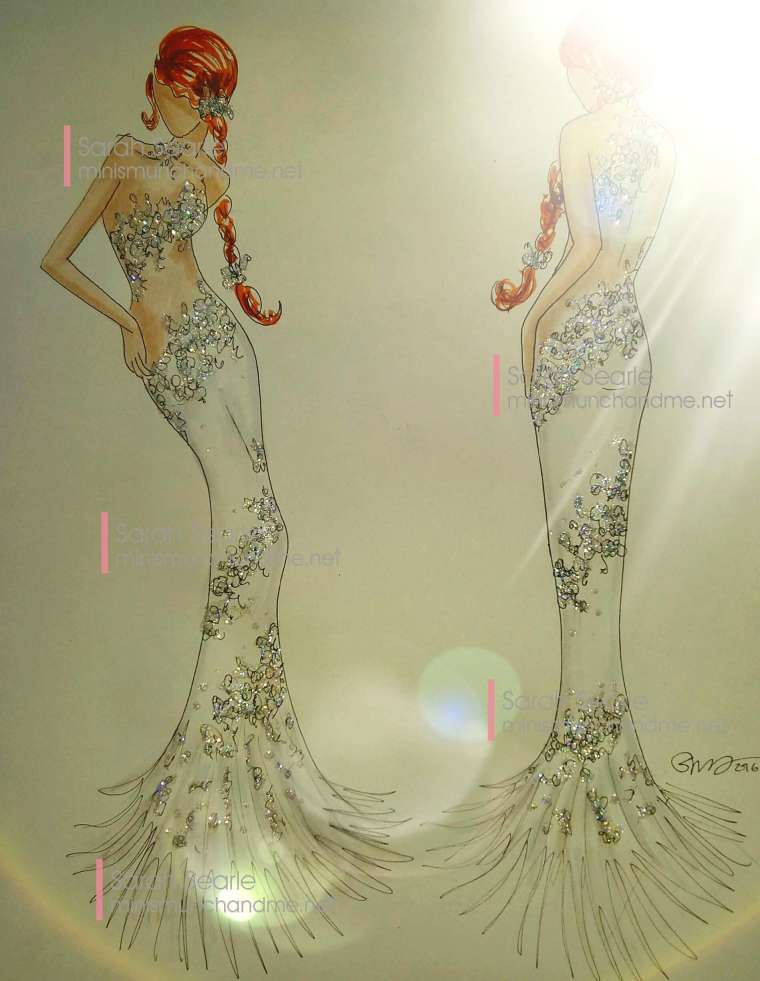
For some reason I’ve become a little obsessed with putting daisies on dresses! It stems (excuse the pun!) from a memory that struck me a short while ago, of making daisy chains with my paternal grandfather. It’s one of my earliest memories.

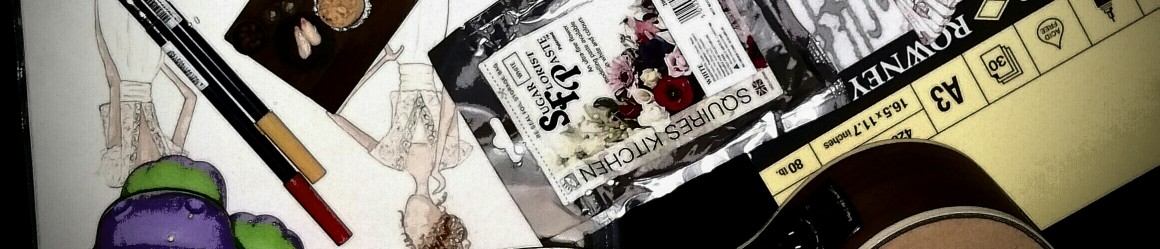
I also decided that I needed something less harsh than the black fineliners I was using for the outline of the designs. I had hoped to find myself a grey Copic fineliner but they seemed to be out of stock wherever I looked so I bought a few alternatives and it was the Staedtler Triplus Fineliner which has beaten the competition for shade and flow. The effect is much softer and much more suitable for bridal.

As for colour, I’ve been building up a nice selection of Tombow pens since I first started this whole design thing. These double ended pens (brush tip and liner) have a lovely satisfying flow and depth of colour as well as a vast palette of shades to choose from. However, until recently I hadn’t used the clear blender pens and palette that are also available.

The palette is, effectively, a small piece of completely non-porous paper. All you do is apply your chosen colour to the palette and then “pick it up” with the blending pen. When applied to your artwork, it naturally creates a graduated effect, making shading smooth and easy. It’s very simple to do in a straight line but not so easy to apply to the curves of a fashion figure or folds of a dress. Well, not easy for me anyway! I’m still working on getting that spot on!

I generally only use 3 or 4 of the multitude of colours that I have but have chosen a nice peacock blue to demonstrate the technique. There are a number of videos on YouTube showing other uses for the blending pens too.

And of course the glitter is there too!

Print
Silk taffeta ball gown with applique daisies and sage green sash
Print
Ball gown with tulle skirt, applique daisies on bodice and illusion back

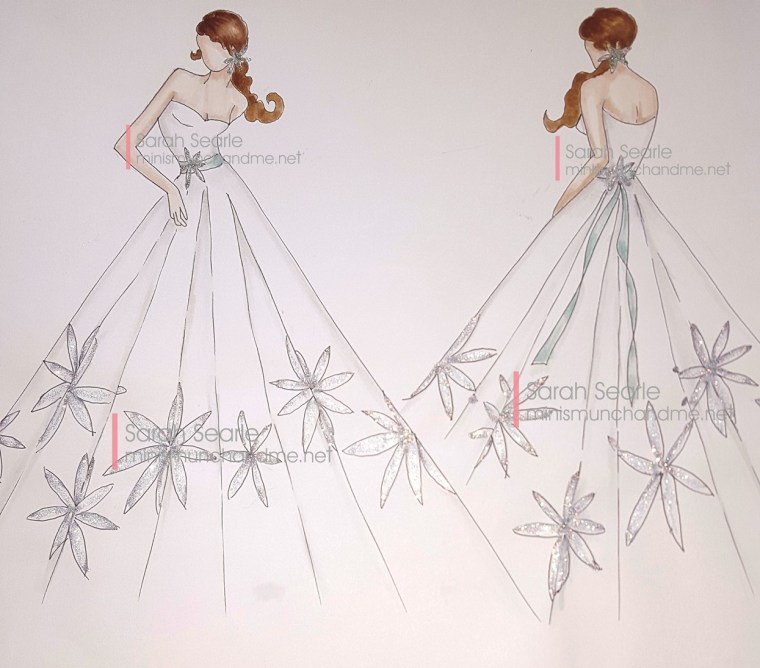
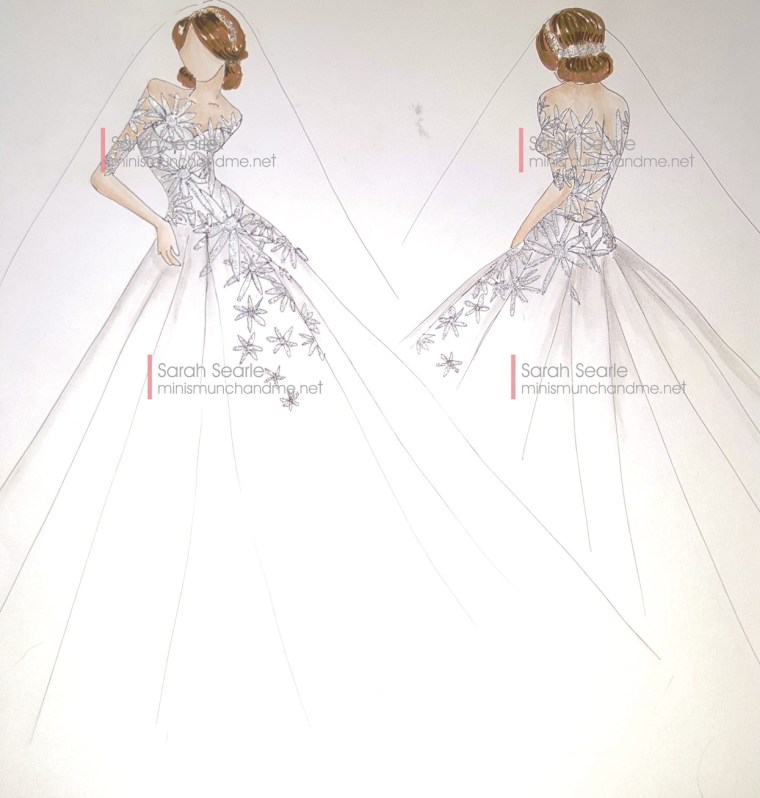
The combination of all these factors has resulted in renewed enthusiasm and a boost to production, such as it is! These few designs are some of the slightly better ones to emerge from this flurry of activity. They are by no means perfect, not even close, but I’m still finding my way.

All designs copyright Sarah Searle 2016.

Advertisement

Grown Up Glitter!

A huge pile of germs and sleep deprivation have been thrown at our house over the last fortnight or so which has meant hobbies and blogging taking something of a back seat to tissues and Snuffle Babe!

I have however found a bit of time to look around for something to bring the bridal designs a bit more to life. I’d been debating using some kind of glitter to convey elaborate beading and “bling” as it’s often referred to on my favourite American bridal show! But it just made me think of kids crafts and shaking some garishly coloured sparkly mess onto blobs of PVA glue and hoovering up the resulting debris for weeks to come.

20160210_140120 - Copy
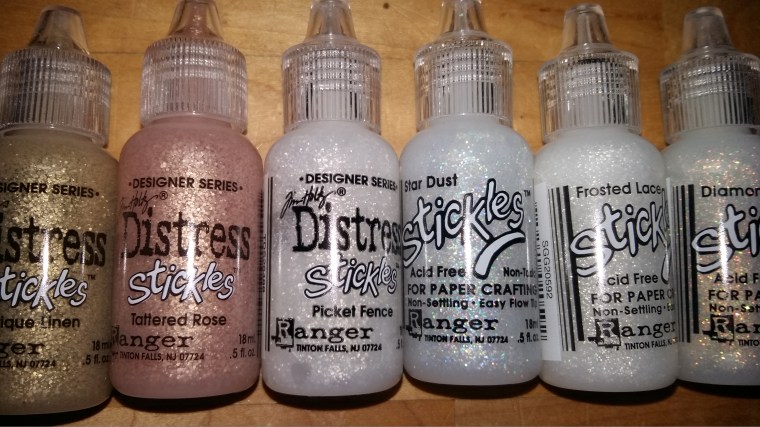
Then I came across the delightfully named Stickles during a cheeky Ebay browsing session. A bit of further investigation lead me to the conclusion that these could be just the ticket so I set about ordering a few that might work.

And I love them! On the whole, they really add another dimension to the dresses and give the impression of beading and sparkle beautifully. And they are super easy to use. They look to be pretty versatile too for projects other than those I’m using them for.

I chose from 2 ranges, what I think are some newer “shades” from your basic Stickles and a couple from the designer Tim Holtz Distress Stickles. I’ve had a go with all of them and have settled on “Diamond” being my favourite and most effective, with “Star Dust” a close second. I thought I’d be especially taken with “Tattered Rose” from the Distress range but I’m afraid on the one design I used it for, it came out looking a bit rash-like!! I think I was a little heavy handed…these darker shades will definitely need a lighter brush application.

DIAMOND

As much as I’m raving about these Stickles, it’s proving very difficult to photograph the results to do them justice. I’ve picked just a couple of images of “Diamond” in use – it’s still impossible to see just how delightfully sparkly they are but hopefully you’ll get the jist!

DIAMOND CLOSE UP

I purchased some of my Stickles from Ebay for under £2 each (always worth searching on here for the best price). The Tim Holtz Distress Stickles were £1.99 from Grafton Crafts. This is by far the best price I’ve found them for (some were in the region of £4-£8 each elsewhere!). The service was great from these guys too and they have a pretty good range of colours.

There really does seem to be an almost infinite array of colours available in the Stickles ranges, just have a quick image search for a colour chart! So although they may not all be suitable for my needs, I think you’re bound to find something that works for you whilst still feeling like you’ve found a “grown up” way to splash glitter around!

Find out more about the complete Stickles range here.

Early Mistakes and Eaton Place!

I think it was about 14 years ago I got my first grown up dollshouse. At the time I couldn’t afford much but still wanted as many rooms as possible. So I really went for quantity over quality.

I was a total novice, I was pretty much skint and terribly impatient to get started. I wish I had waited and done things more slowly and with more care but hindsight is a wonderful thing! In my rush to get going, I didn’t even think about lighting, skirting, cornices or even painting the interior! Instead I used off-cuts of full sized wallpaper, the cheapest dollshouse carpet I could find and made some frankly horrific curtains from scrap material my Mum had.

The exterior faired slightly better but none of the work was done with the care and attention it deserved and, as a result, over a decade later, the decor is looking pretty poor! On top of that, the interior walls are falling down, the glue I used has yellowed and the whole structure is in a fairly sad state.

However, as time went on I became a little more able to buy bits and pieces and have amassed quite a collection of accessories and furniture. I also have some lovely dolls. These came from various places including a couple made by my Mum (I’ll talk about my Mum’s first steps into 12th scale dolls in another post!), and one beautiful one which was a gift, but now of the wrong era! Lots of the furniture is budget and mass produced or bought on ebay but most of it looks pretty good in situ.

About 8 years ago I got seriously into watching re-runs of Upstairs, Downstairs (I even have the box set!) and finally had more of a vision and new enthusiasm for my dollshouse project. Sadly, most of the damage was done and trying to create 165 Eaton Place out of the proverbial sow’s ear was going to be a mammoth task. I also had a real mishmash of periods going on with the furniture.

4 or 5 years ago I added a basement. I took a little more care over the basement rooms (pantry/scullery and a maid’s bedroom – which to my annoyance should really be in the roof!). I’m fairly happy with them but I can’t get away from the errors and issues with the rest of the house!

So despite being a 14 year old project, I have so much work to do and I’m weighing up my options. 

I’ve narrowed it down to either ripping the whole lot out and starting again or saving up for a better quality house and letting Munch start her own little miniature adventures with the old one.

I’m leaning towards option 2. I’ve already identified a few possible candidates! I’ll keep you posted! 🙂

20160125_162035.jpg
Maisie cat getting in on the action during a reset and dust!